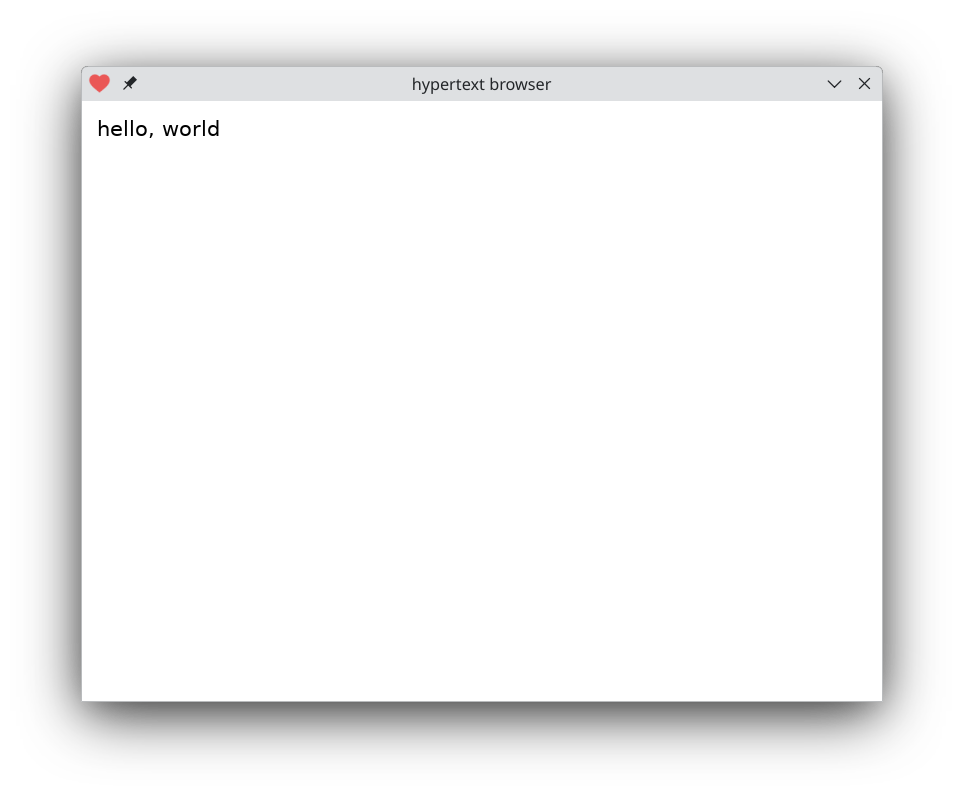
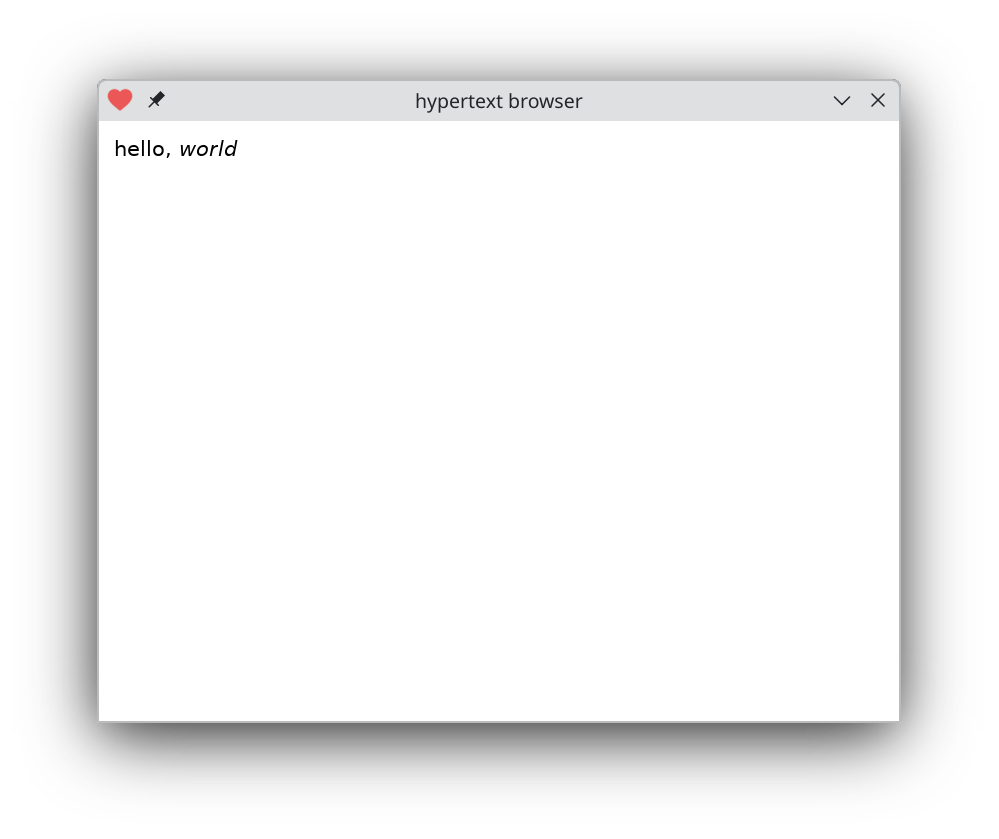
Here's a document containing a line of text:
{type='text', data={'hello, world'}}
I'm building in Lua, so I'm reusing Lua syntax. Here's how it looks:
Such text boxes are the workhorse of this markup language. There are 3 other kinds of boxes: rows, cols and filler. Rows and cols can nest other boxes. But let's focus on text boxes for a bit.
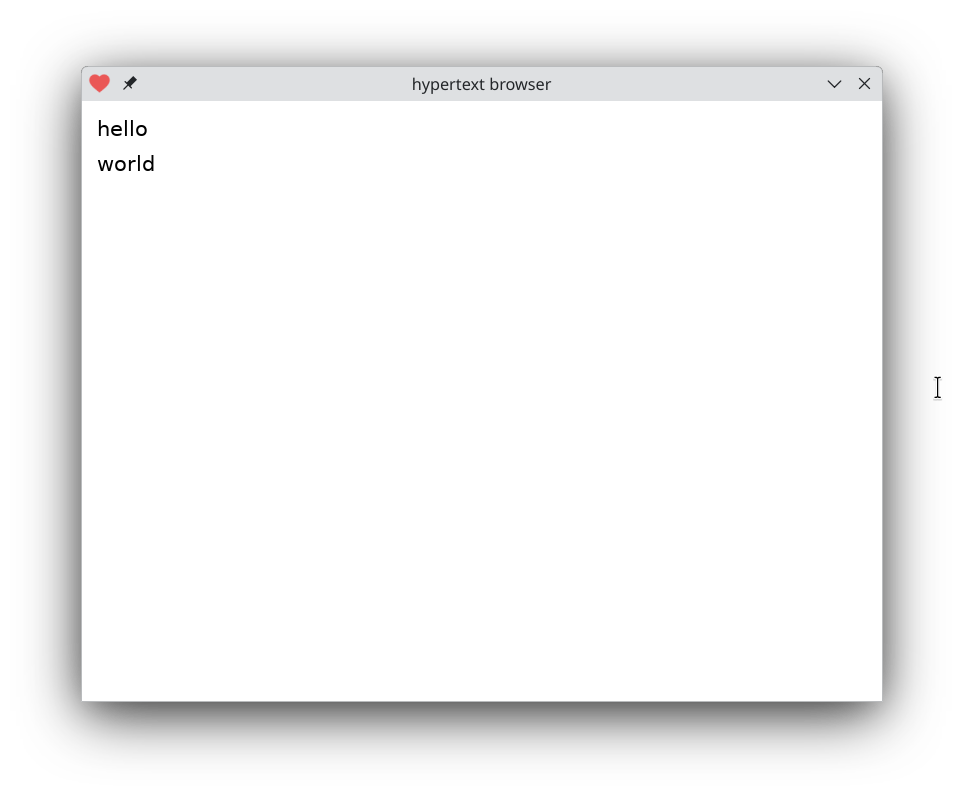
Here's a text box containing two lines of text:
    {type='text', data={
      'hello',
      'world'}}
|
|
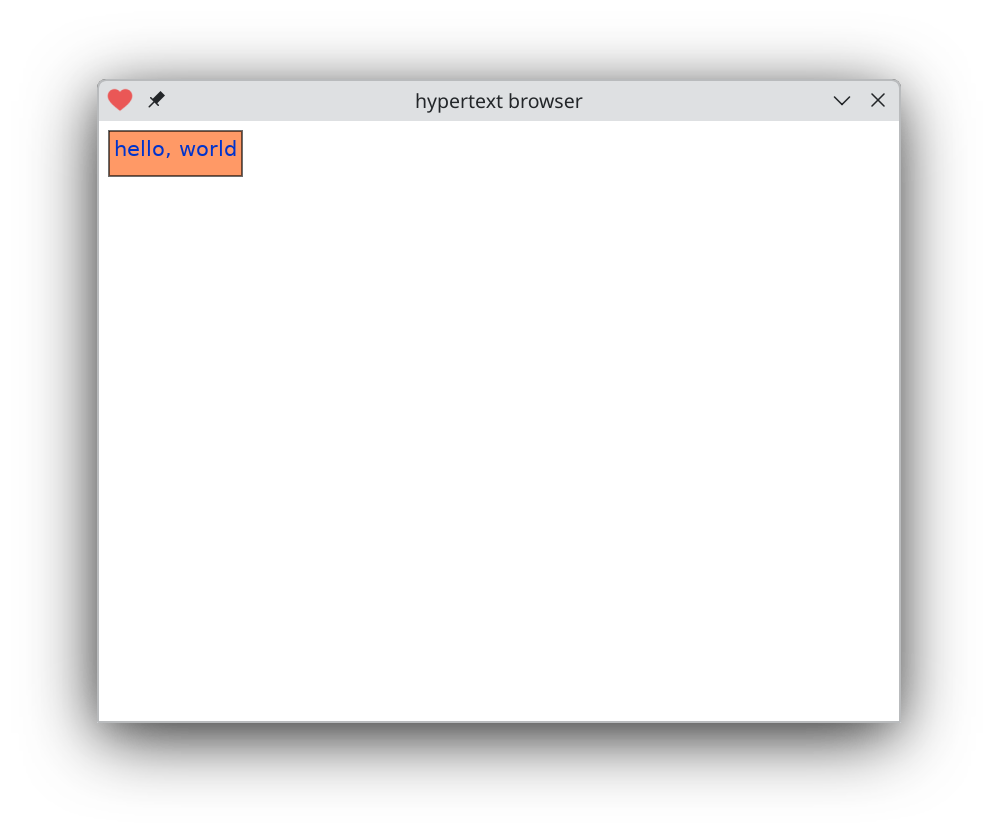
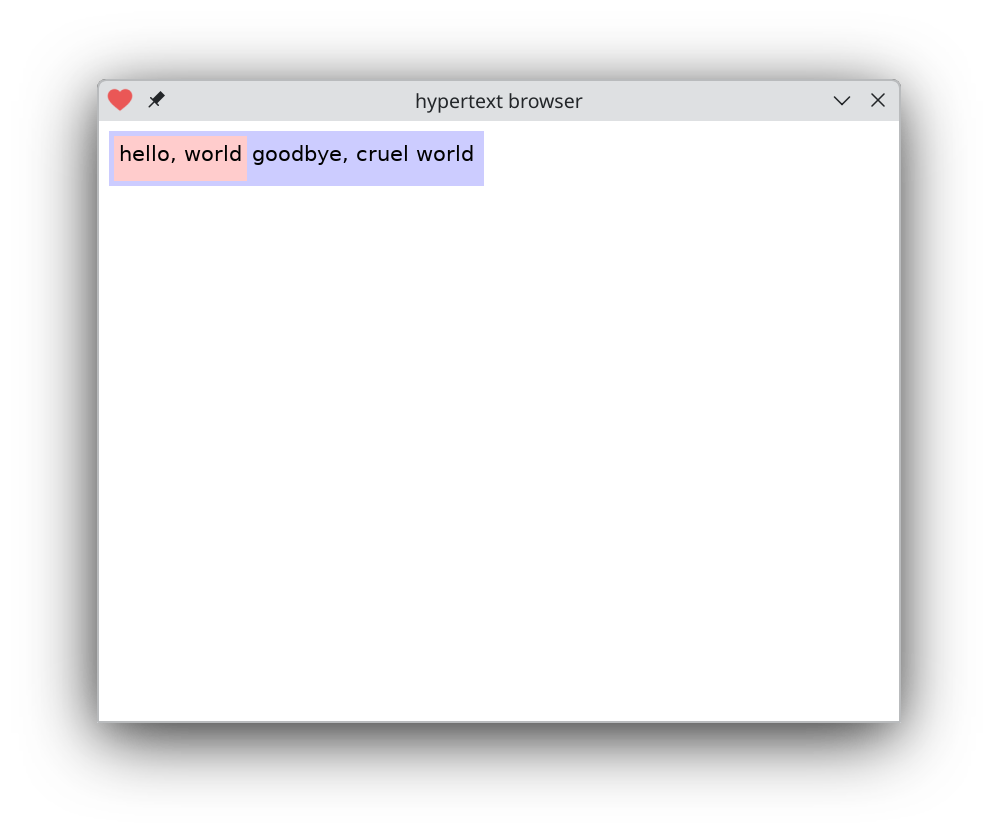
Since it's hypertext, you get a few attributes. You can set color, bg (background color) and border (also color). Each of these is a Lua array of 3 or 4 elements for red, green, blue and transparency.
    {type='text', data={'hello, world'},
      bg={1,0.6,0.4},
      border={0,0,0},
      color={0,0.2,0.8}}
|
|
Notice that the text is not centered vertically. The browser doesn't know details about the font like how far down the baseline is. You have to center manually using line_height.
      {type='text', data={'hello, world'},
        bg={1,0.6,0.4},
        border={0,0,0},
        color={0,0.2,0.8},
        line_height=25}
|

|
I imagine this sort of thing will get old fast. Probably best to use bg and border sparingly.
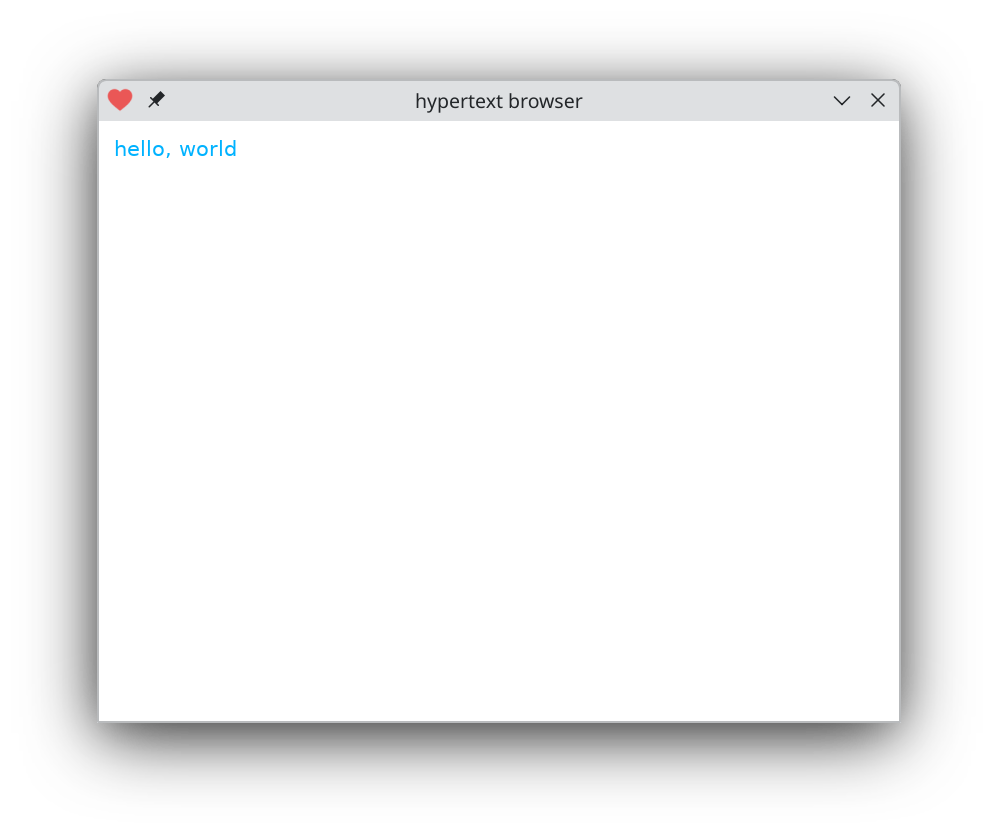
Since this is a hypertext browser, the main attribute of course is hyperlinks. To turn a text box into a link you can click on, use the target attribute.
      {type='text', data={'hello, world'},
        target='x'}
|
|
Links get some default colors if you don't override them. The target is a file path that will open when you click on it; there's no networking here. Press alt+left to go back.
What else. The one remaining attribute text boxes support is font. You can use any font as long as it's Vera Sans (or you're welcome to open up my program and put more fonts in). But you can adjust the font size and select bold and italic faces. However, before we can see them in action I should discuss inline styles.
A text box contains lines. Each line so far has been a string. But it can also be a string augmented with attributes. Here's a line with an inline 'tag':
      {type='text', data={
        {'hello, style1@{world}',
          attrs={
            style1={font={italic=true}},
          }},
      }}
|
|
(So many irritating silly curly brackets! But I hope you'll stick with me here. The goal is a simple markup language that is easy to implement while still providing some basic graphical niceties.)
Inline segments of text are surrounded in @{...} and prefixed with an alphanumeric name. (So they have to begin at the start of a word, after whitespace or punctuation.) The name gets connected up with attributes inside a block called attrs.
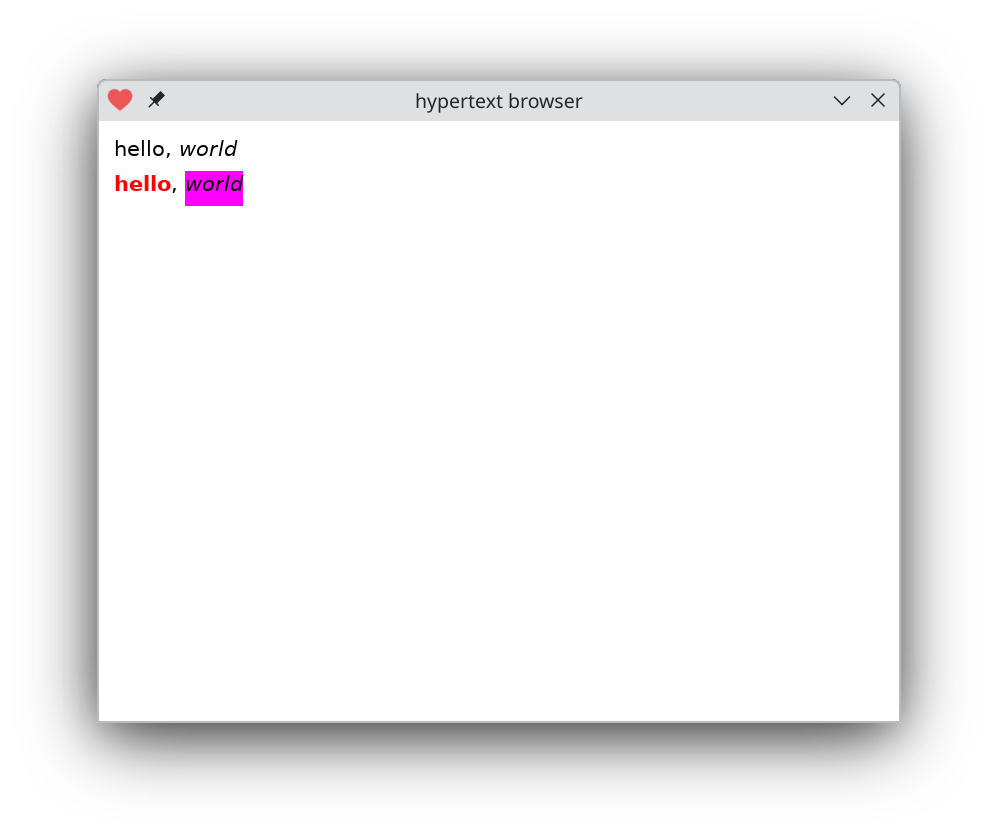
To stretch our legs, here's a text box with two lines, each containing inline markup for font and color.
      {type='text', data={
        {'hello, style1@{world}',
          attrs={
            style1={font={italic=true}},
          }},
        {'style1@{hello}, style2@{world}',
          attrs={
            style1={font={bold=true}, color={1,0,0}},
            style2={font={italic=true}, bg={1,0,1}},
          }},
      }}
|
|
Each line's attributes are independent. So far you can't change font size or add borders inline, because it complicates matters to change line height within a line, and also seldom looks nice.
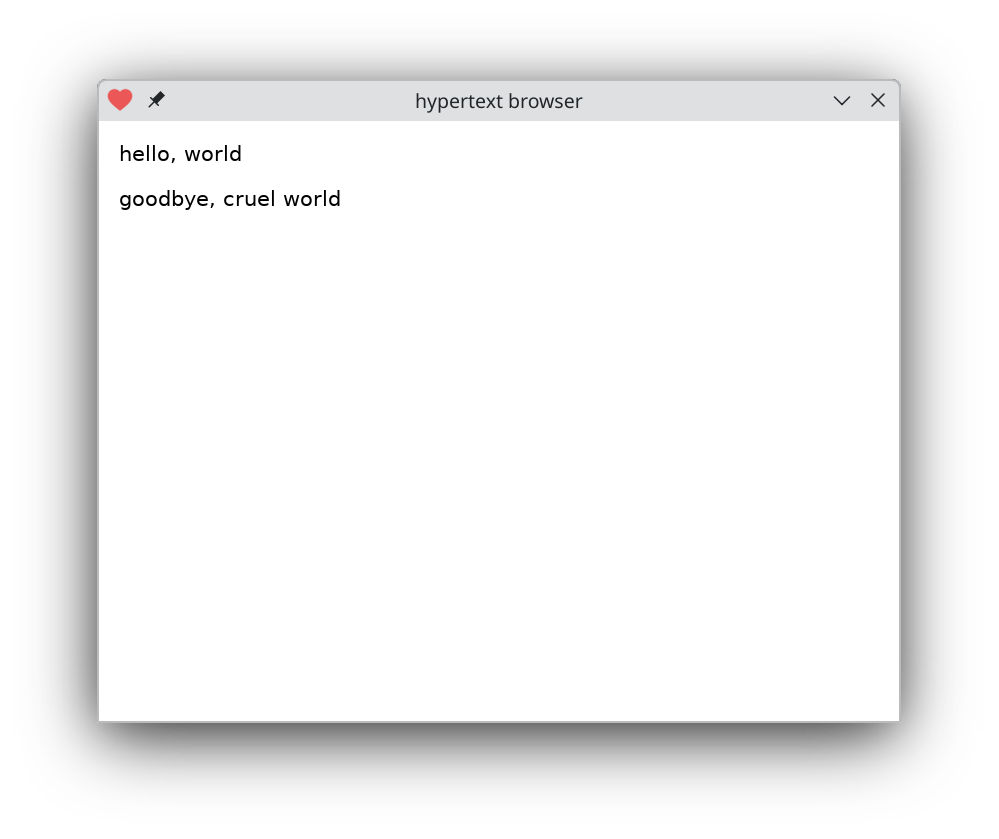
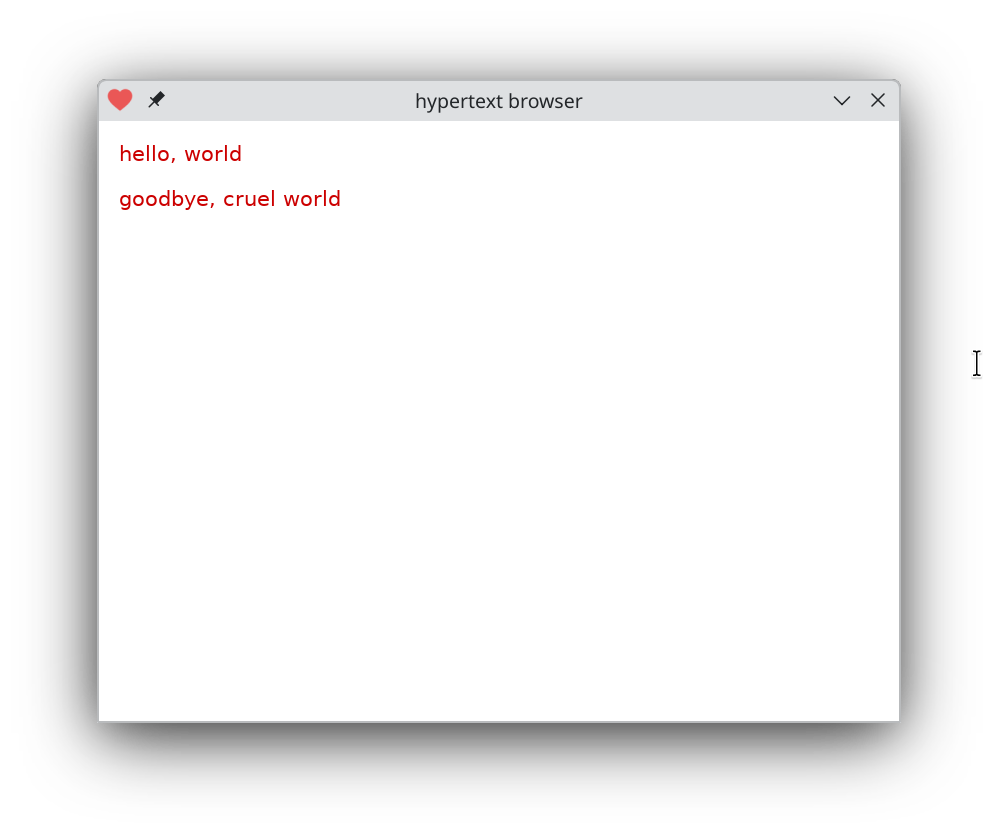
Inline attrs should arguably be used sparingly. The pattern I've been using more is to give each text block a uniform font and mix and match combinations of text boxes. There are 2 ways to combine text boxes: rows and cols. Here's a vertical array of text boxes:
      {type='rows', data={
        {type='text',
          data={'hello, world'}},
        {type='text',
          data={'goodbye, cruel world'}},
      }}
|
|
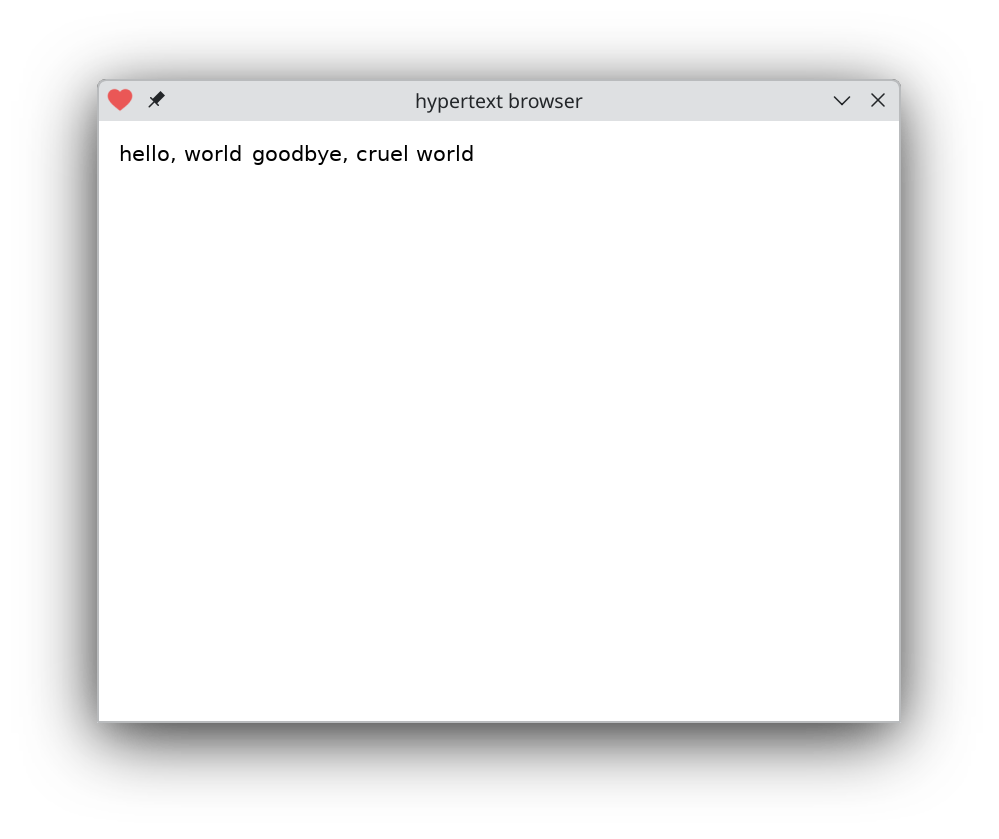
      {type='cols', data={
        {type='text',
          data={'hello, world'}},
        {type='text',
          data={'goodbye, cruel world'}},
      }}
|
|
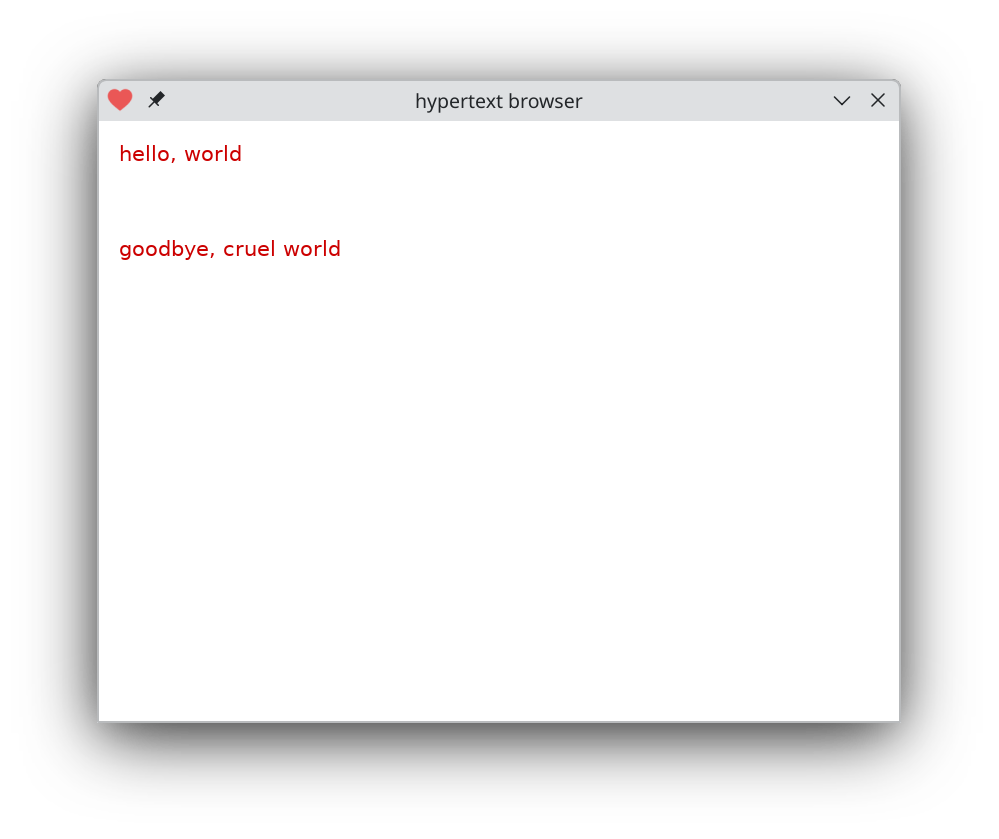
It's hard to see, so let's make the border more obvious. You can add attributes to rows and cols just like to text.
      {type='cols', bg={0.8,0.8,1}, data={
        {type='text', bg={1,0.8,0.8},
          data={'hello, world'}},
        {type='text',
          data={'goodbye, cruel world'}},
      }}
|
|
All children of rows share a width, and all children of cols share a height. Children can also share other attributes when specified in a default attribute:
      {type='rows',
          default={color={0.8,0,0}},
        data={
          {type='text',
            data={'hello, world'}},
          {type='text',
            data={'goodbye, cruel world'}},
      }}
|
|
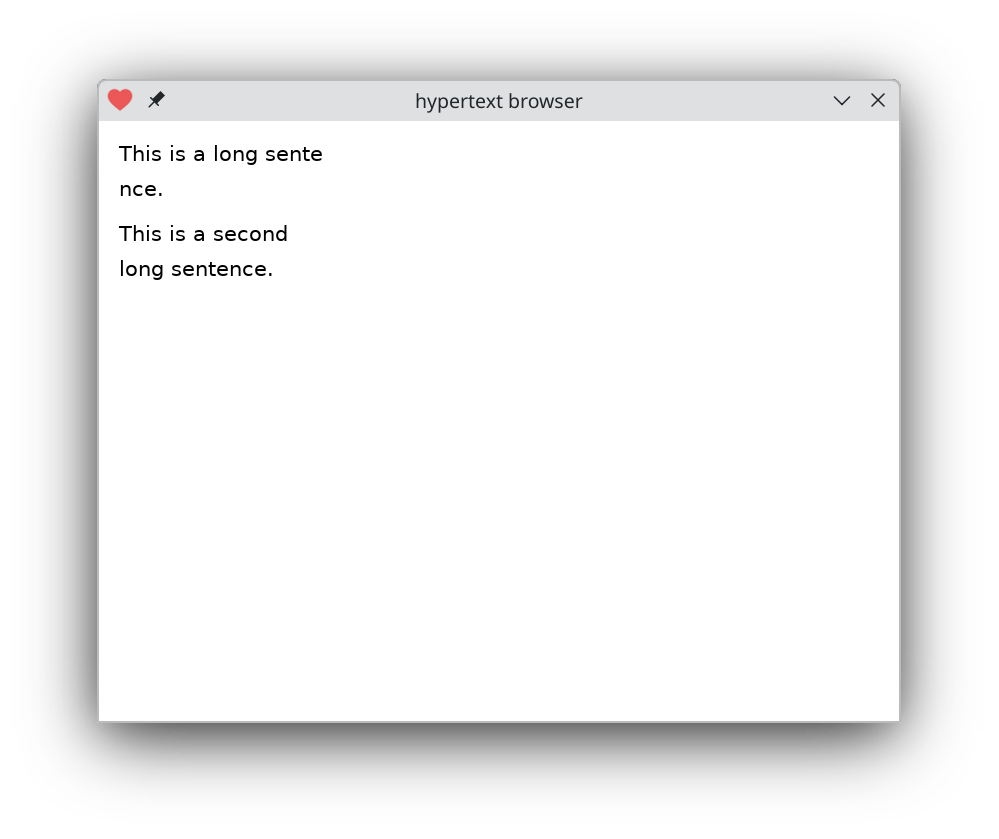
Widths and heights will grow and shrink depending on what you put in them, but you can also fix a width in rows and text boxes, and lines will wrap as needed.
      {type='rows', width=200, data={
        {type='text', data={
          'This is a long sentence.'}},
        {type='text', data={
          'This is a second long sentence.'}},
      }}
|
|
Notice that it'll try to wrap at word boundaries if it can. But it'll chop mid-word if a line would be too empty without the entire word.
For completeness, here's a filler box. All it does is add padding within rows and cols. Within rows, filler needs to specify a height, and within cols, a width. The other dimension will resize as needed.
      {type='rows',
          default={color={0.8,0,0}},
        data={
          {type='text',
            data={'hello, world'}},
          {type='filler', height=50},
          {type='text',
            data={'goodbye, cruel world'}},
      }}
|
|
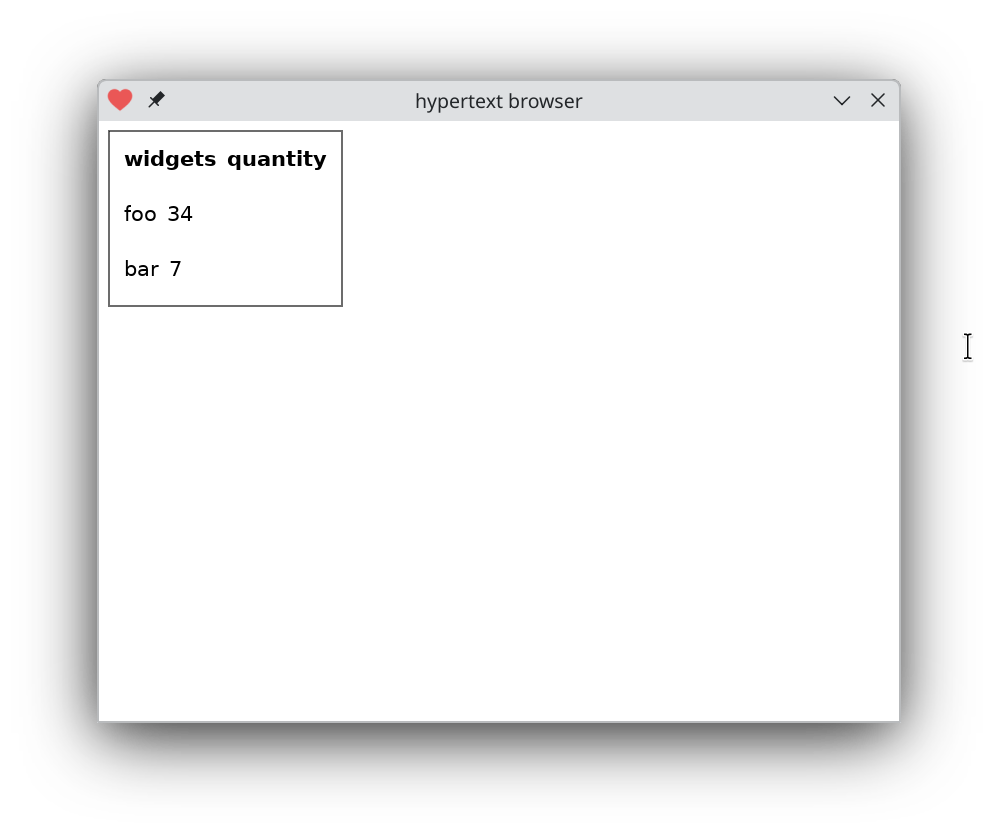
Putting it all together, here's a table:
      {type='rows', border={0,0,0},
          default={border={1,1,1}},
        data={
          {type='cols',
              default={
                font={size=21, bold=true}},
            data={
              {type='text',
                data={'widgets'}},
              {type='text',
                data={'quantity'}}}},
          {type='cols', data={
            {type='text', data={'foo'}},
            {type='text', data={'34'}}}},
          {type='cols', data={
            {type='text', data={'bar'}},
            {type='text', data={'7'}}}},
      }}
|
|
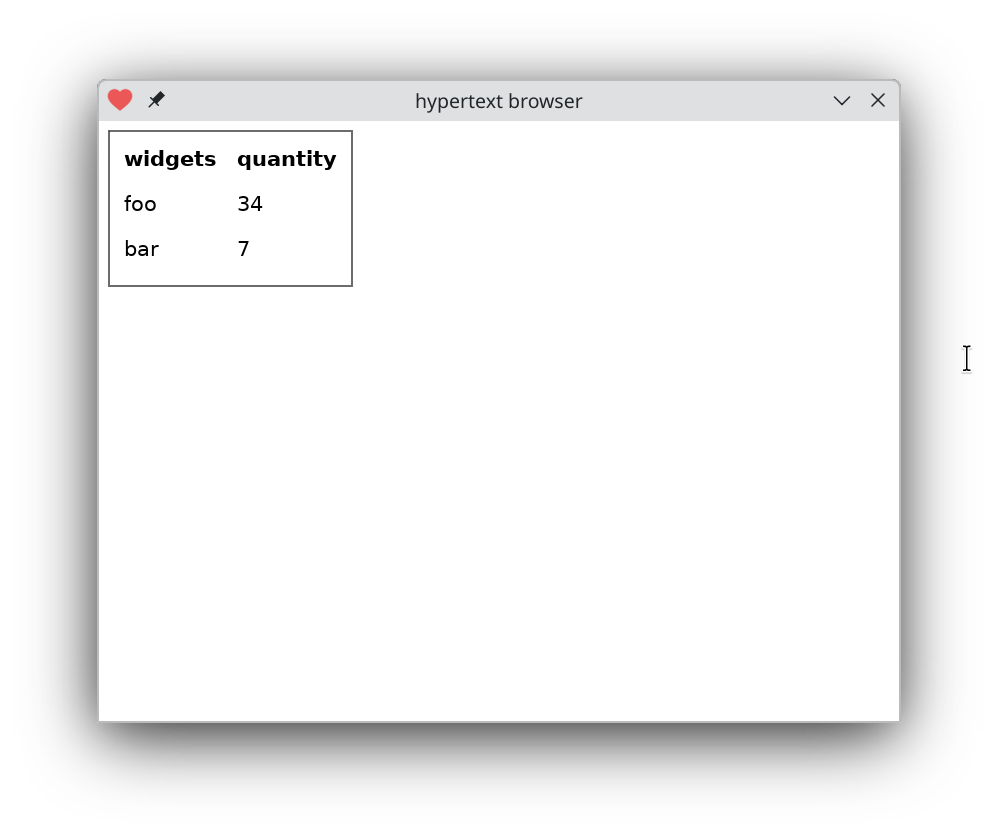
No wait, that's not right:
      {type='cols', border={0,0,0},
          default={border={1,1,1}},
        data={
          {type='rows', data={
            {type='text', font={bold=true},
              data={'widgets'}},
            {type='text', data={'foo'}},
            {type='text', data={'bar'}}}},
          {type='rows', data={
            {type='text', font={bold=true},
              data={'quantity'}},
            {type='text', data={'34'}},
            {type='text', data={'7'}}}},
      }}
|
|
That's annoying! You have to specify columns before rows, or you're stuck manually sizing widths. But, 600 lines of code! Here it is. You'll need LÖVE, but the code should be easy to port to other graphics toolkits, the markup to JSON literals, etc. The program is a zip file containing the source code.
Comments gratefully appreciated. Please send them to me by any method of your choice and I'll include them here.